Cropping a full size 8.5" x 11" page to a 4" x 6" label
Print
Created by: 1 2
Modified on: Wed, 3 Mar, 2021 at 12:32 AM
Some shipping platforms only provide you with a full page (8.5" x 11") document.
Frequently, they use half of the page for the shipping label and the other half for receipt or packing slip.
While there are many ways to split this page into a 4" x 6" label size, here is our favorite method:
1."Take a Snapshot"
2."Crop pages" -> Remove White Margins:
Download Adobe Reader for "Take a Snapshot"
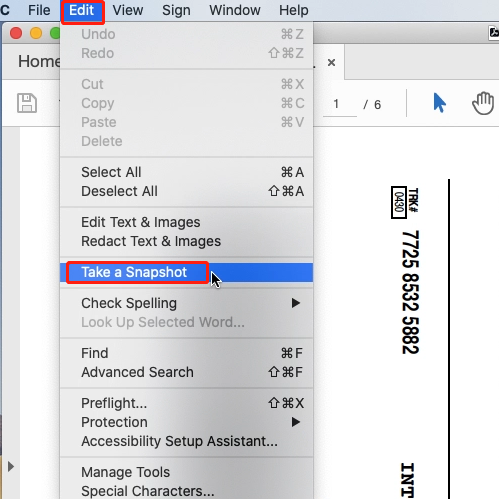
1."Take a Snapshot"
①Save your label as a PDF file
For Mac:
②Open the file in Adobe Reader
③Go to "Edit" -> "Take a Snapshot"
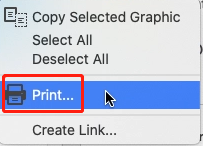
④Drag the box over your label, then right click on it and select "Print"

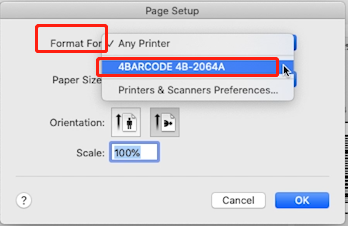
⑤Select Printer -> Click "Page Setup..."


-> Select Printer from "Format For: " -> Select label size from "Paper Size: "
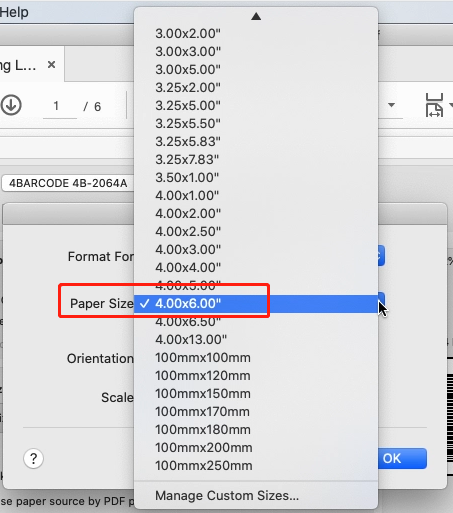
⑥If the size you need not is not listed, then click "Manage Custom Sizes" -> input width, height and rename the size, then click "OK"
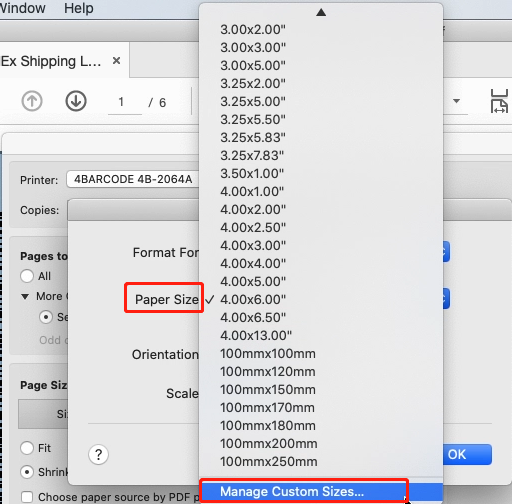

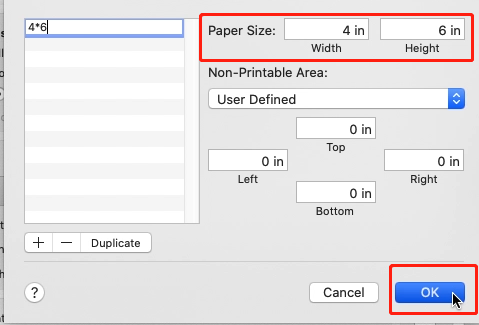
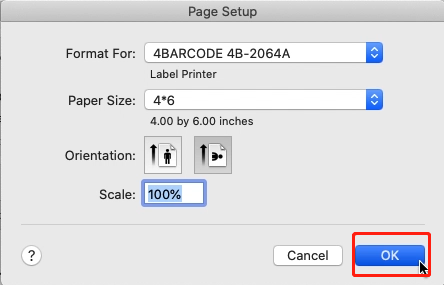
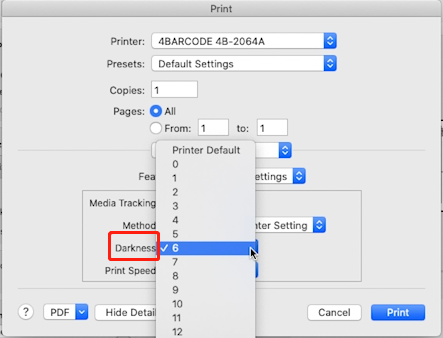
⑦Click "Printer..." -> "Show Details" -> Select "Printer Features" in "Preview"


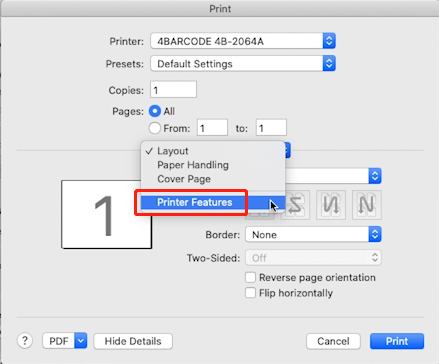
⑧You can set up printer properties, such as "Media Tracking", "Darkness" and "Print speed".
(Larger number means higher Darkness)

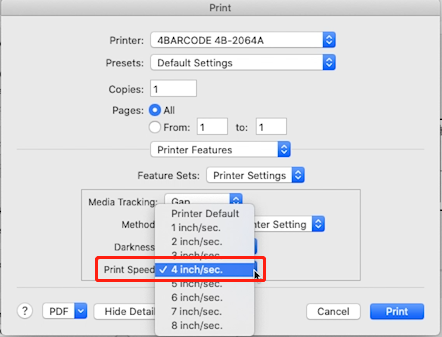
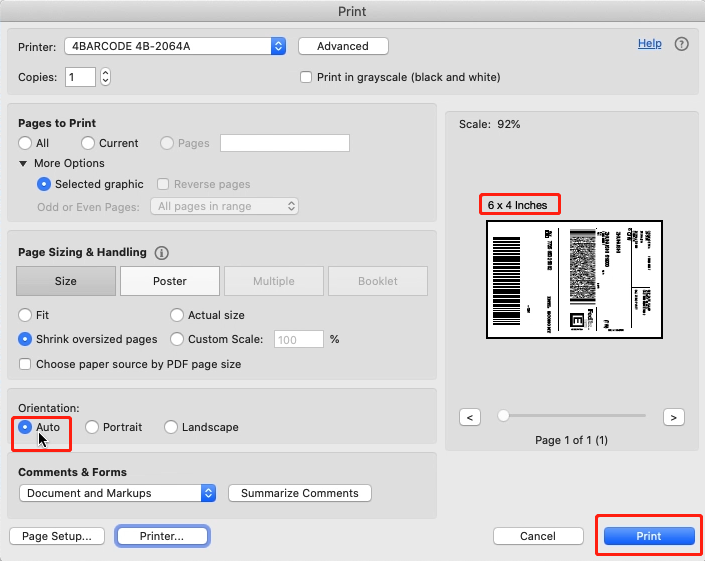
⑨Preview, check the print size and Orientation. If preview looks good, click "Print"
For Win:
②Open the file in Adobe Reader
③Go to "Edit" -> "Take a Snapshot"

④Drag the box over your label, then right click and select "Print"


⑤Select Printer -> Click "Properties"
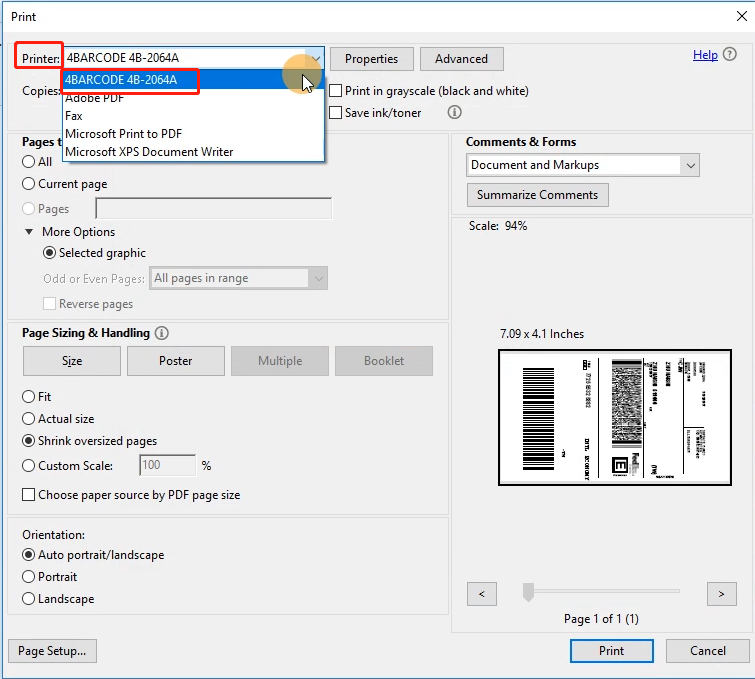

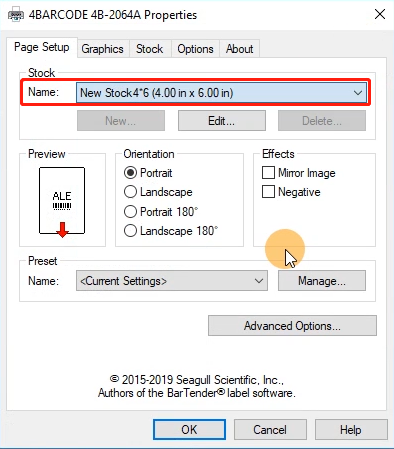
-> Go to "Page Setup"-> Select label size from "Name"

If the size you need not is not listed, it needs to create a new size.
Right click on "This PC", choose "Properties", then click on "Control panel"-> "Devices and Printers"
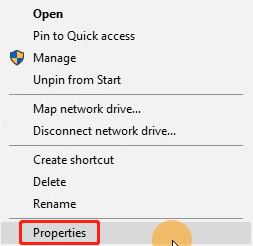


Right click on "4BARCODE 4B-2064A" -> choose "Printer Preferences"
-> Go to "Page Setup" -> click "New" to create a label size, then click "OK"


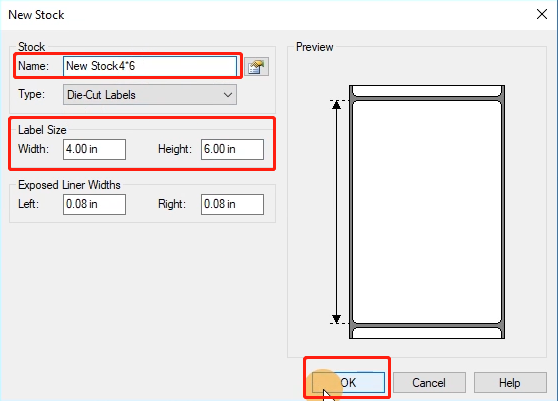
⑥Go back to Adobe. Click "Properties" -> Select the label size from "Name"

⑦Go to "Option" -> Untick "Use Current Printer Settings". You can change the printing speed and the Darkness of your printing (Larger number means higher Darkness)


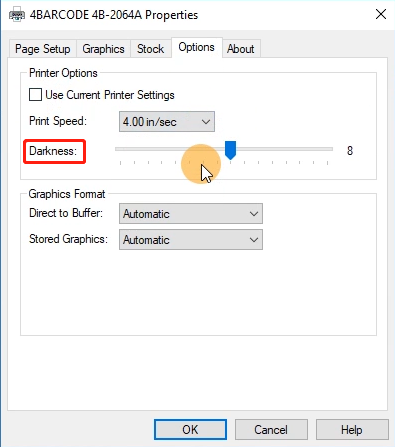
⑧Check the created size and click "OK"

1 is the author of this solution article.
Did you find it helpful?
Yes
No
Send feedback Sorry we couldn't be helpful. Help us improve this article with your feedback.


